in the kitchen

in the kitchen
Showing posts with label snacks. Show all posts

Sunday, November 5, 2017

Pumpkin Spice Cream Cheese

Do you crave Pumpkin Spice flavor every Autumn? I do. Pies, cake, breads, crackers, dips and spreads? For sure! Here is a flavored cream cheese superb for a beautiful slice of artisan bread or a lovely toasted bagel. Using Greek yogurt cream cheese ups the protein count quite a bit... so you can feel good about indulging in this one!
Pumpkin Spice Cream Cheese
8 ounces Greek yogurt cream cheese
2 1/2 tablespoons pumpkin puree
2 tablespoons sugar
2 teaspoons dark molasses
1/2 teaspoon ground cinnamon
1/4 teaspoon ground ginger
1/8 teaspoon ground cloves
Combine all ingredients in a bowl and mix vigorously until thoroughly combined and smooth.
Spread thickly onto bagels or sour dough bread slices. Top with pomegranate arils if desired. Refrigerate leftover cream cheese mixture promptly.

Hints: If the cream cheese is a set out for 20 minutes or so, it will be easier to blend but can be done straight from the fridge. Be sure to blend until all the lumps are incorporated. The molasses give a depth of flavor that is really nice but if you don't have any, this spread will still be nice. Up the spices by 50% for a stronger, spicier flavor. This can be used as a fruit platter dip with apples, grapes etc.

So the truth is that we ate our toast topped with this spread and pomegranates, then sat down with a bowl of  the spread and pomegranates without the toast and ate it by the spoonful. It is so good! I think you could serve it as a mousse for dessert and no one would be the wiser. Or stuff some puffs and be prepared for a slew of compliments!

Wednesday, October 4, 2017

Apple and Spiced Malt

Apples require nothing to make good snacks, I know. But this simple rub makes my "snack" more like a "treat". The malty, spicy goodness is worth the 30 seconds it take to mix together.

Apple and Spiced Malt
1 apple, quartered and sliced
1 tablespoon malted milk powder
1/2 teaspoon ground cinnamon
1/8 teaspoon ground cloves
In a small bowl mix malted milk powder with cinnamon and clove. Dip apple slices in powder and enjoy.


Hints: A sweeter variety of apple is best - like Gala, Pink Lady, Fuji or Golden Delicious. Malted milk powder is available at most grocery stores. I keep it on hand for several recipes as it adds an extra note of flavor in pizza crust and breadsticks. It is terrific in yogurt based smoothies, and a classic in any flavor milkshakes. (It has no added sugar so it is a pretty low carb and low cal flavor additive.) You can add more cinnamon or clove if you like. Ground ginger would be nice as well.

This is a healthy treat that requires no cooking and can be made with items from your pantry. Super fast, slightly elevating a plain apple to treat status. You will be glad you tried it!  

Wednesday, January 29, 2014

Hummus with Roasted Sweet Potato

Hummus and fresh veggies in the fridge means a healthy snack is always an option. Sweet potato ramps up the nutritional heft and the flavor in this version of hummus. I used part of the roasted sweet potato in a souffle and the rest for this appetizer/snack. Neal uses hummus instead of mayo on his sandwiches--have I mentioned he's a smart guy? With a few pantry friendly ingredients and a bit of time you can have a flavorful, healthy dip/spread at the ready.
Hummus with Roasted Sweet Potato
4 cloves garlic
1 cup sweet potato chunks, 1- 2 inch dice
2 teaspoons olive oil
1 15 ounce can garbanzo beans
2 tablespoons tahini paste (I buy this at the local grocery store)
3 tablespoons lemon juice
2 teaspoons lemon zest
Salt to taste
Heat oven to 425 degrees. Toss unpeeled garlic and sweet potato chunks with olive oil and place on a roasting sheet. Cook for about 20 minutes or until tender, stirring once. When cool enough to handle, squeeze garlic out of skins into a food processor bowl along with the sweet potato. Drain beans, reserving liquid. Add beans, tahini, lemon juice and zest. Pulse several times. With processor on, pour in some of the reserved liquid and process until very smooth. Use up to half the liquid, depending on the consistency you like. Add salt to taste. Serve with naan, pita bread or veggie dippers.
Hints: A drizzle of extra virgin olive oil on top is great when serving it with naan or pita bread. Add more or less lemon if you like. Hummus should be very smooth and creamy. I like mine with a bit more body, especially with veggie dippers, and so I use less of the liquid from the beans. It is always easy to add a bit more liquid but impossible to take any out so don't let it get soupy (if it does, open another can of beans). This recipe doubles easily w/o any modifications. Good served at room temp, OK chilled, too. Stores for several days in the fridge.
Sweet potato makes this hummus colorful, so serve it with bright green veggies for a great visual payoff. Happy snacking! (Check out Lemon and Carrot Hummus  for another non-dairy, non-gluten recipe.)


Monday, June 17, 2013

Balsamic Vegetable Phyllo Triangles

A working lunch happens fairly often. Taking a meeting or working on a project while noshing is nothing new. These savory triangles fill the need for fast and convenient yet healthy food. They keep well and are delicious warm or at room temperature. Or try them as an appetizer at your next party!
Balsamic Vegetable Phyllo (Filo) Triangles
1/2 pound of frozen filo sheets
1/3 cup extra virgin olive oil, divided
1 cup sweet potato, 1/4 inch dice
1/2 cup red bell pepper, 1/4 inch dice
1/3 cup thin asparagus, cut into 1/4 inch pieces
2 tablespoons finely diced purple onion
2 tablespoons pine nuts
2 tablespoons chopped fresh rosemary
1 1/2 cups roughly chopped Swiss chard
1 teaspoons kosher salt, plus some for sprinkling
1/8 to 1/4 teaspoon red pepper flakes
1/3 cup balsamic vinegar
Optional: 1/3 cup feta or Balsamic Bellavitano cheese
Thaw filo in the fridge for several hours or overnight. When veggies are diced and ready to go, heat 2 tablespoons of the olive oil over medium high heat. Add sweet potatoes, cook and stir for 3 or 4 minutes or until they begin to caramelize. Stir in red pepper and continue cooking 2 or 3 minutes more. Add asparagus, purple onion, pine nuts and rosemary. Cook and stir for 2 more minutes. Add Swiss chard and continue cooking for 2 more minutes. When chard has wilted, stir in 1 teaspoon salt and red pepper flakes. Pour balsamic vinegar into pan then cook and stir until vinegar has been absorbed in the veggies, about 4 minutes.
 Put the olive oil in a small bowl. Place one sheet of filo onto a work surface, keeping other sheets under plastic wrap. With a pastry brush or your fingers, spread a bit of olive oil over the filo then top with another sheet. Spread oil on 1/2 of this filo sheet, lengthwise. Fold sheets in half lengthwise. Place about 1/4 to 1/3 cup filling on one end in a rough triangle. Top with 1  tablespoon cheese, if using. Fold into triangle shapes, like a flag is folded. Tuck ends in, place on an ungreased baking sheet, brush top with oil then sprinkle with some kosher salt. Repeat until all the sheets of filo are used. Place sheet in a cold oven and turn temperature to 350 degrees. Bake 20 to 25 minutes or until golden brown. Serve warm or at room temperature. If using the cheese, make sure to chill with in one hour. 

 Hints: The filo will dry out but not too quickly as you work with it. Keeping it covered will help with that. Use spinach if you don't have Swiss Chard. Dried rosemary would work but fresh is a bit better. You could substitute another herb such as oregano or thyme if you like. Use as much red pepper flakes as you want or leave them out altogether. The balsamic is lovely in this filling and I love it with the rosemary. These are pretty messy to eat but worth every crumb! This filling would also work in a yeast dough as a calzone or in pie crust dough as a savory hand pie.
I have made these with and without cheese. They are delicious both ways. It just depends on whether you want to up the protein or you want straight vegan fare. Try my recipe for spanakopita if you like these.


Friday, May 3, 2013

Apricot Ginger Cookies

Cookies! You know you love them. I do, too. With apricot and ginger these oat based cookies are tender, chewy, rich and relatively healthy. Not to mentions super tasty.
Apricot Ginger Cookies
1/2 cup butter
1/4 cup honey
1/4 cup brown sugar
1/4 cup white sugar
2 teaspoons freshly grated ginger root
1/2 teaspoon salt
2 eggs
1 1/2 cups rolled oats
1/2 cup wheat flour
1 cup white flour (approximately)
1 teaspoon baking powder
3/4 cup chopped dried apricots
3/4 cup white chocolate chips
Cream butter, honey and sugars until smooth. Add ginger, salt and eggs and beat again. Place oats in a blender container. Blend until they become flour. Add to the egg and sugar mixture. Mix in the flours and baking powder. When dough is thoroughly combined, stir in the apricots and white chocolate chips. Heat oven to 350 degrees. Shape dough into a 8 x 8 inch square on parchment paper. It will be 1/2 to 3/4 inch thick. Cut into 2 x 1/2 inch rectangles. Place on an ungreased cookie sheet and bake for 11 to 13 minutes.
Hints: I use regular salted butter in this recipe. Add just enough white flour to make a stiff dough but not so much that it is dry. Likewise, don't over-bake the cookies or they will be tough and dry instead of chewy. The dough can be frozen once it is cut into bars, then baked from frozen. I have found that the apricots work best if cut into 1/4 inch chunks. If they are smaller than that, they blend into the dough; if larger than that, they don't get distributed well. Add more ginger root if you want a real statement cookie, up to another full teaspoon. These would be good with a dark chocolate drizzle topping or a ginger glaze.
A warm ginger cookie is just about as good as it gets on a chilly evening. These are hard to resist, so make them when you can share with some friends.


Wednesday, March 13, 2013

Roasted Red Grape Salsa

Perusing my Pintrest connections introduced me to roasting grapes. Who would have thought taking lovely grapes and heating them up was a good idea? Well, I did. Genius! I thought. So off we went on a roasted grape adventure. The recipes that inspired me are here and here and are very nice ideas in my opinion. I intend to try them both. However I needed a buffet style dish and wanted to try making some flour tortilla chips, here is what happened--
Roasted Red Grape Salsa
4 cup small red grapes, rinsed and dried
2 tablespoons grape seed oil (or canola oil)
1/2 teaspoon kosher salt
1 1/2 teaspoons minced fresh rosemary
1 tablespoon sliced green onion
1 tablespoon chopped pistachios
1 cup crumbled bacon (cooked crisp)
Optional:Up to 1/2 teaspoon crushed red pepper or 1 tablespoon diced jalapeno pepper
crackers, chips, flat bread or toast for serving
Heat oven to 450 degrees. Toss the grapes with the oil and place in a single layer on a roasting pan. Sprinkle with salt. Cook for 15 minutes. Remove from oven and allow to cool completely. Transfer to a glass mixing bowl, using a rubber scrapper to get all the juices from the pan into the bowl. Stir in the rosemary, green onion, pistachios, bacon (and red pepper or jalapeno if using). Check for seasoning and add more salt if needed. Serve at room temperature with crackers, chips, flat bread or toast. (See hints for additional serving ideas.)
Hints: If your grapes are larger, you may need to roast them a bit longer. You can chop the grapes on the roasting pan or even puree them before you add the other ingredients if you want a smoother product. Adding the spicy peppers may be just what you are looking for but is not necessary to have a flavorful, intriguing dish. I think this would be good served over pork medallions or grilled chicken. Or smoothed over fresh mozzarella in a panini. It would also be awesome served over a block of cream cheese with crackers.
Here are the grapes on my roasting pan--roasting pans are different than cookie sheets in that they are battle scarred and tough looking. They have taken the heat in many situations and have developed the perfect patina for their calling in life. I admire my roasters, tough old soldiers!


Sunday, February 17, 2013

Lemon Garlic Dip

Adding more veggies to your diet is great...but the downside may be what you eat with them. I had an opportunity to indulge in a veggie tray last week but the dip was a ranch type that was loaded with salt, preservatives and unpronounceable chemicals. Coming up with a healthier dip that used real ingredients presented itself as a challenge. Here is the result. (Works great as a dip for Rice Crackers, too.)

 Lemon Garlic Dip
1/2 cup Greek yogurt
1/3 cup sour cream
2 tablespoons mayonnaise
2 teaspoons Dijon mustard
1 garlic clove
Zest from 1/2 lemon
3/4 teaspoon kosher salt
1/8 teaspoon white pepper
Optional: up to 1 tablespoon minced fresh herbs such as parsley, chives, rosemary, sage, thyme etc.
Optional garnish: 1 ounce finely grated Colby Jack cheese or chopped pistachios
Place yogurt, sour cream, mayo, mustard in a bowl. Using a micro planer, grate peeled garlic clove over the top. Zest lemon with planer as well. Add salt, pepper and herbs if using, then mix thoroughly. Top with garnish if desired. Serve with prepared veggies.
Hints: I didn't have any fresh herbs for this photo session but they would be great addition if you have them. Some herbs will be stronger than others so watch how much you add. You can serve these in individual portions or present as a traditional tray. Taste to see if you need more salt. Use Miracle Whip instead of mayo if desired, the result will have a hint of sweetness. Refrigerate left overs soon after serving.
With Colby Jack cheese garnish
With chopped pistachio garnish
Probably healthier than packaged ranch dip mix, definitely much fresher tasting. Raw veggies are delicious on their own but a bit of dip adds a complexity of flavor that our palates appreciate. Try this dip with crackers, as a sandwich spread or as a base for a salad dressing.

Sunday, January 13, 2013

Curried Rice Crackers

Snacking on my mind again. Thinking about all the ways I feed my body, snacking happens fairly often for me. I try to go for the handful of almonds or a dried apricot or plum. However there are times that call for a bit more...crunch, shall we say. I made these crackers and felt that they were worthy of sharing. Let me know if you like them.
Curried Rice Crackers
2 cups cooked rice (for the photo above, I used 1 cup brown and 1 cup black)
1 1/2 teaspoon curry powder
1 teaspoon salt
1 teaspoon toasted sesame oil
1 tablespoon grape seed oil (or other vegetable oil)
2 tablespoons water
2 tablespoons sesame seeds
Heat oven to 375 degrees. In a food processor bowl, combine rice and curry. Process by pulsing until the rice is pulverized. Add the salt, sesame and grape seed oils. Process on a steady setting until the mixture begins to pull together. While machine is running, pour in 1 tablespoon water. Add another tablespoon slowly, using just enough to help the dough form a ball. Stop the machine and add the sesame seeds. Pulse a few times to combine. Place a sheet of parchment paper on a large baking sheet. Turn the dough onto the paper and spread it out very thin using a rubber scrapper. It should be thin enough to yield a crisp cracker that you can almost see through when baked. Cut with a pizza cutter into 1 1/2 inch squares. Bake for 30 to 35 minutes until beginning to brown. The crackers will pull apart as they bake. Serve with veggies or hummus if desired.


Hints: Great way to use left over rice. I keep some cooked rice in my freezer and use it for things like this. Getting the mixture thin is crucial to having crackers verses weird, leathery textured things. Bake longer if you need to get them crisp. It is hard to see the browned look in these photos because of the black rice, with brown or white rice, you will be able to tell easier. You can certainly change up the flavor by omitting the curry and replacing it with another spice or herb. The parchment paper helps with the spreading and the clean up but these could be made without using it or use a silicone sheet.

When you need a "crunch", nothing else will do. These are a good alternative to chips or popcorn, (although some days are chip worthy). The dark color you get with black rice is super fun to add to a snack or appetizer platter. Dairy and gluten free, too.

Saturday, January 5, 2013

Quinoa and Almond Crackers (Q & A)

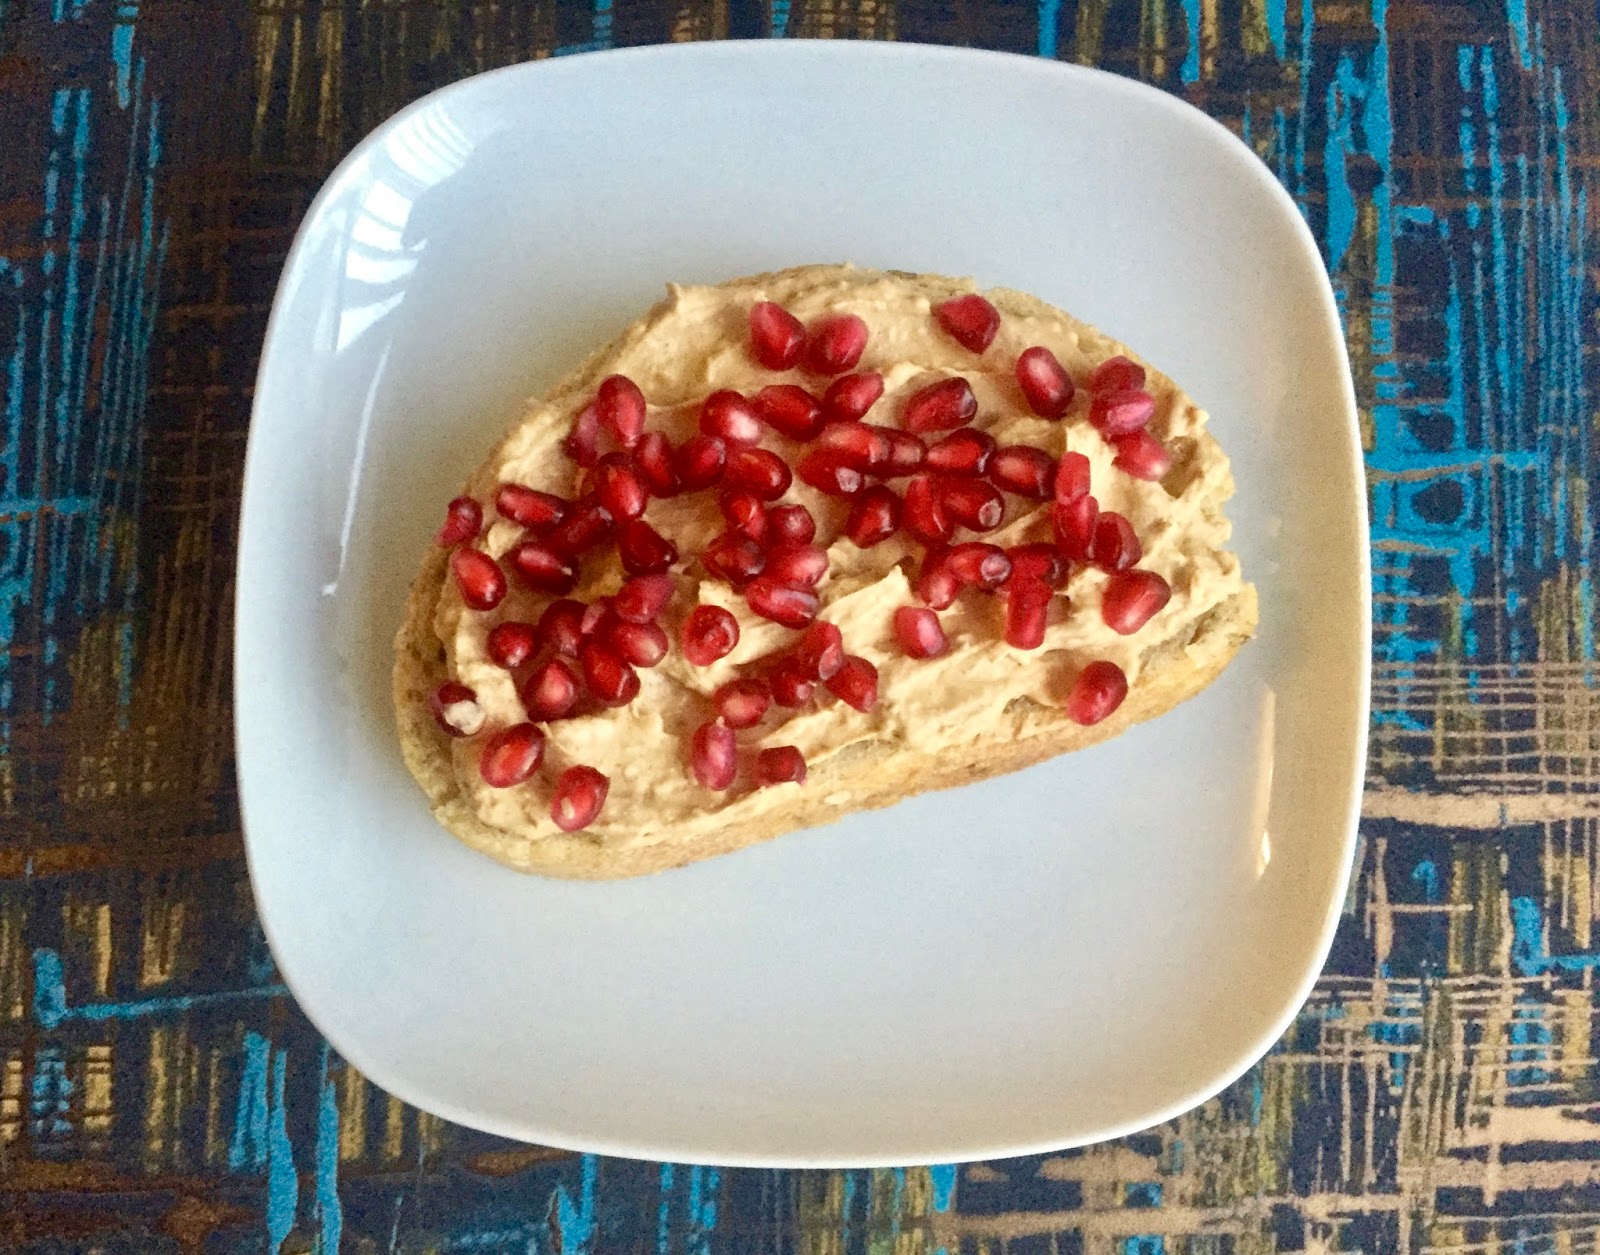
I like crackers but, only certain kinds. Triscuits but not Wheat Thins. Sociables but not Ritz. Really enjoy water biscuits with a wonderful topping: pear and blue cheese. I created this cracker recipe because I wanted to have another way use leftover quinoa and because I was hoping to come up with a new cracker favorite for snacking. It worked! These are inexpensive to make, take just a few working minutes (besides chilling and baking time), are loaded with protein, have no added chemical preservatives, and taste amazing. Try them with the cheese spread recipe included in this post.
Quinoa Almond Crackers
1/4 cup almonds
1/2 cup boiling water
1/2 cup old fashioned rolled oats (certified gluten free if desired)
1 teaspoon dried rosemary
1 teaspoon dehydrated onion
1/2 teaspoon kosher salt
1/2 cup cooked quinoa (cooked in plain water with salt as directed on package)
1/2 tablespoon balsamic vinegar
1 tablespoon extra virgin olive oil
Place almonds in boiling water and allow to sit for 60 seconds. Remove with a slotted spoon to a paper towel. Reserve water. Slip skins off almonds and discard. Set almonds aside. Place oatmeal in a food processor bowl (or use a blender). Process until oats become powdery. Add blanched almonds and process until mealy. Add rosemary, onion and salt and process again until all ingredients are very well combined. Add in quinoa and process until smooth, scraping down sides as needed. With machine running, pour in vinegar and olive oil. Add 1/2 tablespoon of the reserved water at a time until the dough forms a ball, scrapping sides between each addition. Using parchment paper as a base, roll dough into a log about 1 to 1 1/2 inches in diameter. Roll parchment paper around log and freeze for 1hour or until thoroughly chilled. Heat oven to 350 degrees and remove log from freezer. Cut crackers from log into 1/8 inch or less rounds. Place the parchment paper on a 12 x 17 inch baking sheet and then press the crackers a bit to thin them out as you place them on the baking sheet. Bake until they begin to brown on top, about 30 minutes. Remove from oven and place crackers on a cooling rack. Allow to cool completely. Store short term (up to three days) in an open container at room temperature. Long term, store in an air tight container in the freezer.
Hints: These crackers are gluten free if you choose certified gluten free oats. Other oats may have some cross contamination but still be very low in gluten. You can use blanched almonds that you purchase if you like, in that case just use plain water at the end as needed. Make sure the quinoa is cool or room temperature, not hot when you add it in. You could make these crackers square or another shape very easily by shaping the log differently.

Apricot Rosemary Cheese Spread
3 ounces cream cheese, room remperature
2 tablespoons finely grated Balsamic Bellavitano Cheese (or Romano)
1 tablespoon finely chopped pepitas
1 tablespoon finely diced dried apricots
1/2 teaspoon crushed dried rosemary
1 to 2 tablespoon balsamic glaze
Mix all ingredients but the glaze together in a bowl. Form into a log and place on a serving platter or in a serving bowl. Drizzle with glaze before serving.

Hints: This mixture could be formed into a cheese ball and rolled in pepitas and rosemary. Use commercial balsamic glaze or check this recipe out for an excellent option you can make at home.

Who doesn't love cheese and crackers? This is a very easy make ahead party idea but is also an excellent snack for yourself and family. These are headed to family favorite status already!


Sunday, September 27, 2009

Hummus w/ Lemon and Carrot

Hummus with Lemon and Carrot
1 can garbanzo beans (15 oz)
3 tablespoons tahini (sesame seed paste)
1 lemon
1 teaspoon toasted sesame seed oil
1 teaspoon crushed garlic
1/2 teaspoon sea salt
2 tablespoons finely grated carrots

Drain garbanzo beans, reserving the liquid. Place beans in a food processor with tahini. Zest lemon with a micro planer and then cut in half and juice. Add zest and juice to beans along with remaining ingredients. (You can reserve a bit of lemon zest and grated carrot for garnishing.) Process until very smooth. Pour in some of the reserved liquid as needed to get desired consistency. Hummus is typically a bit runny but can be made stiffer for spreading (it will stiffen up after being chilled). Serve with pita bread, toasted artisan bread, corn chips or cut veggies. Refrigerate tightly covered.  

Hints: Garbanzo beans are also called ceci beans or chick peas. I always have them on hand for white chili, salads and hummus. Tahini is available in most grocery stores and can be eaten on pita bread as is. Toasted sesame oil is very strong flavored so be careful not to add too much. It also is readily available.

I first tried my hand at making hummus to save money.  The store bought kind can be expensive. But now I make it because I can control the flavors and get just what I like. I hope you experiment and come up with your favorite flavor. Please share with me if you do.